[Home]

Table of contents


Projects

This course has two projects each carrying 10 marks.

Estimating the frame rate of a video camera without using a precision clock

A video camera works by taking snaps at regular time intervals (e.g., 30 snaps per second). The number of snaps per second is called its FPS (Frames Per Second) value. Most cameras advertise their FPS values (or even allow the user to select the value). But sometimes a camera departs from the advertised value in two ways:
  1. The FPS is lower than the advertised value. Each snap requires some processing after being taken (eg, compressing and storing). The older the camera gets the more time these operations take. This leads to a drop in the FPS value.
  2. Even though the FPS value is maintained most of the time, one or two frames are dropped occasionally.
Given a camera we want to see if the camera suffers from these problems. One way could be to videograph the face of a precision clock. But it is not easy to see clearly from a video the dial/screen of a clock of sub-second precision. This project explores an alternative idea: pitching the camera against a known law of physics involving time.

The law that we shall choose is the law of gravitation, which implies that if a stationary object is dropped from a height $h$ then its height at time $t$ during free fall is $h-\frac 12g t^2$, where $g$ is the acceleration due to gravity.

We may try to use this to estimate the FPS value of a camera as follows. Here is how you may extract the frames from a video. Most digital paint programs show the pixel coordinates of the mouse position as ou hover the mouse over an image. GIMP is just one such free software.

Making a vector map stitching satellite screenshots

Consider a region samll enough so that earth's curvature may be ignored, yet large enough so that Google map cannot fit it in a single screen at high resolution.
We cover the region with a number of overlapping screenshots all of the same resolution.
Each rectangle is a screenshot (hence is of the size of your monitor). All the screenshots are numbered. To understand the subsequent steps we focus on two overlapping screenshots (say screenshots 1 and 2):
The red dots are known locations that you can identify at the current resoluton of the screenshot. Note that the central location is part of both the screenshots. For each screenshot find the approx pixel coordinate of the location (e.g., by clicking on the centre of each red disk, and reading the mouse coordinates). For example, we measure $(r_{1j}, c_{1j})$ from screenshot 1:
Here $r$ stands for "row", and $c$ for "column". The first subscript is the screenshot number, the second is the location number (we assume that the central red dot in the $j$-th in the list of the known locations). Similarly, from screenshot 2 we measure $(r_{2j}, c_{2j})$:
Notice that we are using the same $j,$ as it is the same location.

Thus our data set consists of a subset of $(r_{ij}, c_{ij})$'s for $i=1,...,$number of screenshots, and $j=1,...,$number of locations. Of course, not all $(i,j)$ pairs occur in the data, since the $j$-th location may not show up in the $i$-th screenshot.

Let $(\mu_i, \lambda_i)$ be the true position of the $i$-th location (w.r.t. some global coordinate system).

We can set up a linear model to estimate $(\mu_i, \lambda_i)$'s from the data.

The project consists of the following parts:
  1. Working out the theory: this involves setting up the linear model, and working out the rank of the design matrix. [5 marks]
  2. Implementing the entire thing in R: the final software should take a list of screenshots and show them one by one in R, allowing the user to click on the known locations. The system should save the click locations as well as the location identifiers. Then then the system should run the linear model to estimate the true positions. [10 marks]
  3. Allow screenshots of different (known) resolutions.[ 5 marks]

Some R tips

You may read a jpeg image in R and display it as:
library(jpeg)
x=readJPEG('screenshot1.jpg') #replace screenshot1.jpg with your image name.

plot(1:2,ty='n') #set up the screen as [1,2]x[1,2] or whatever you like.

rasterImage(as.raster(x),1,1,2,2) #draw the image on screen.
You may need to install the jpeg package first.

Similarly, there is a package called png for reading images in the png format.

To allow the user to click at points on an image and to get the coordinates of the clicked points:
p = locator(1) #for one click
p = locator(2) #for two clicks
p = locator() #for any number of clicks (end with a rightclick)
In each of these cases p stores the coordinates of the clicked points (w.r.t. the coord system you set us using the plot command earlier).

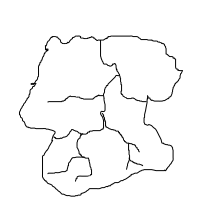
Please work with the map of a real location that interests you. Some of you may collaborate to make a detailed map of the same place.

Comments

To post an anonymous comment, click on the "Name" field. This will bring up an option saying "I'd rather post as a guest."